If you would like to adjust how often Outlook or Thunderbird checks for new mail, click on the appropriate tab below.


  1. Click on File in the Ribbon interface.
    Click on the File Tab in the Ribbon 
  2. Click on Options in the sidebar.
    Click on Options in the Sidebar 
  3. When the Options screen opens, make sure you are on the Advanced tab by clicking on it.
    Select the Advanced Tab on the Options Screen 
  4. Under the Send and Receive category (you may need to scroll down), click on the Send/Receive... button.

     
  5. Make sure Schedule an automatic send/received every _____ minutes is checked in the window that appears, then adjust the minutes by typing a number into the box next to "minutes" or by clicking on the up or down arrow in that same box.
     
  6. Click Close to close the send/receive options window, then click OK to close the Outlook Options window.

Outlook will now automatically attempt to send or receive mail as often as you have specified.


  1. Click on the Tools menu and 
    Click on the Tools Menu
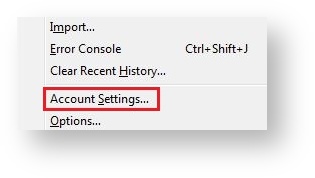
  2. Select Account Settings.
    Next, click on Account Settings...

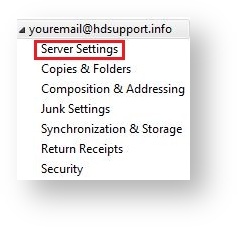
  3. Click on the Server Settings tab under the first email account you want to change.
    Select the Server Settings tab
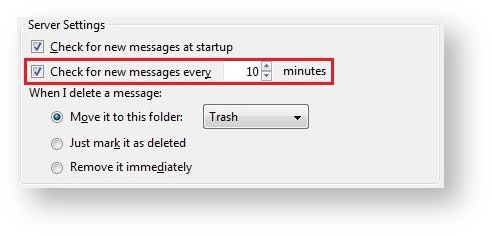
  4. The mail checking frequency is set with Check for new messages every __ minutes. Check the box next to this item and fill in an appropriate number of minutes.
    Check the Box Next to Check for New Messages and Fill in the Number of Minutes Between Checks

  5.  Click OK to save changes.

From now on, Thunderbird will check for new mail in that specific account as frequently as you have selected.

Repeat the steps above for other email accounts you have set up.