PuTTY is is an open source SSH client for Windows, and allows you to securely connect to remote servers from your Windows machine.
| Table of Contents | ||
|---|---|---|
|
Installation
If you don't have PuTTY installed,
...
visit the Download PuTTY page and download a Windows installer
...
from the Package files section of the page.

Tip If you are uncertain which installer to pick, you should probably download the 64-bit MSI Windows installer. - Run
...
- the installer and follow the steps.
- Once the installation is complete, you can launch the PuTTY application and start the configuration.
Configuration
When you launch PuTTY, the main session configuration screen will appear. There are a large number of available options, but most people will only need to adjust a few.

- Start by entering

Configuration
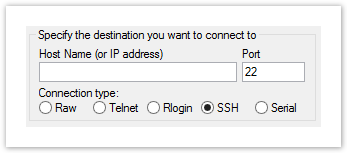
The first screen you will see is the PuTTY Configuration screen.
 While PuTTY allows you to tweak and customize a large number of settings, often the Host Name (or IP address) and Port fields are all that need to be filled in to connect to a server.
...
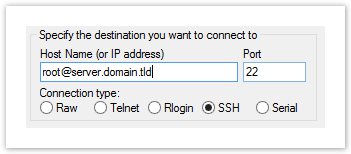
- the Host Name (or IP address)
...
- of the server you
...
- are trying to connect
...
- to.
- If you have a shared or reseller package, your username is going to be the same as your cPanel username.
- If you have a VPS or dedicated server, your username is going to be
root.
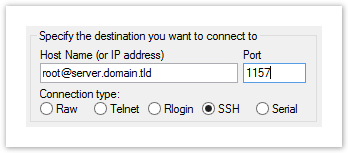
The Port field is likely already set to the default SSH port '22'. You will likely need to change this field to another port based on your package:
- Shared or Reseller: 1291
- VPS: 1891
- Dedicated Server: 1157
If you have a VPS or dedicated server package and have changed your SSH port after it was deployed, you will need to set this field to whatever your SSH port is.
| Note |
|---|
Shared and reseller users do not have shell access enabled by default. Please contact our Support team, and request Jailed Shell Access if you wish to connect to the server using SSH. |
Once both the Host Name (or IP address) and Port fields are filled out, click Open to connect to the server.
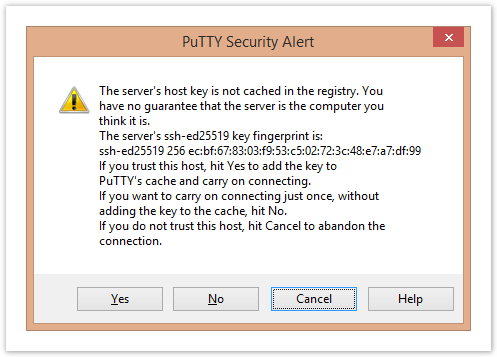
PuTTY will ask you to confirm that you trust the server the first time you attempt to connect. Selecting Yes will save in the server's identity so PuTTY does not ask this question again, and selecting No will not save the server's identity and PuTTY will ask if you trust the server when you attempt to connect again. Selecting Cancel will abort the connection altogether.
The server will have you verify identity by entering in your password.
- If you connected using your cPanel username, this password will the password to your cPanel account.
- If you connected as
rootor as another Linux user, the password will be the server's root password or the user's password respectively.
It is important to be aware that characters will not appear on the screen as you type. Press the Enter key to submit the password.
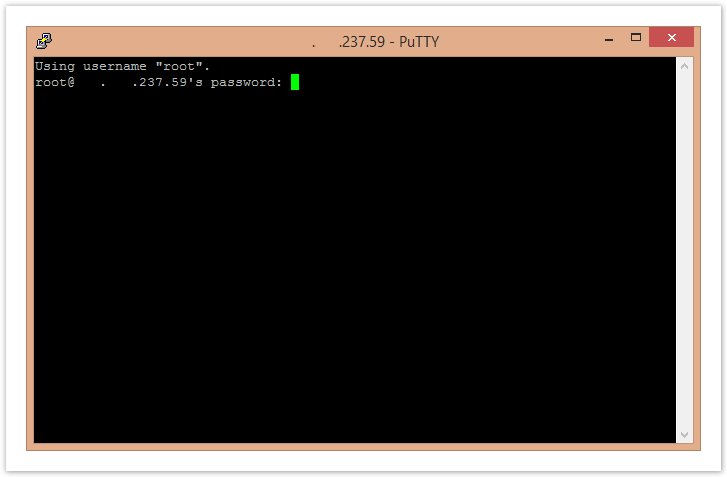
If everything has been done correctly, you're now connected to the server!
- You can specify the user you want to connect to your server as by adding it before the server hostname followed by an @ symbol so the whole thing looks similar to an email address, like username@some.hostname.com.
- By default the Port will be set to 22 as this is the standard port for SSH on most servers. Adjust this number as needed.
- Our servers often use custom SSH ports to help evade automated hacking tools. The ports are as follows:
- Shared or reseller server: 1291
- Legacy VPS (KVM/Xen/OpenVZ): 1891
- Dedicated servers: 1157
- Our servers often use custom SSH ports to help evade automated hacking tools. The ports are as follows:
- Make sure the Connection type is set to SSH.
- If you're not using a private key to connect to your server and you don't want to save your configuration for later use, you can click Open to initiate an SSH immediate connection to your server to authenticate via your account password.
- If you'd like to use a public/private key pair to connect to your account and you haven't configured it already, read the SSH Key Authentication section below before continuing.
- If you'd like to save this configuration for later use before connecting, skip to the Saving your PuTTY Configuration section and follow those directions before returning here.
- If this is the first time you are connecting to your server, PuTTY will display a Security Alert letting you know that PuTTY doesn't have a key in the registry for this server. This is normal for your first connection.
- If everything is OK, click Yes and PuTTY will remember this server in the future and won't warn you about connecting unless the server appears to be different for some reason (in that case you'd see another warning). If you get another warning for a server you know you've connected to before and told PuTTY to remember the server, you should be very careful, since you aren't connecting to the same server.
- If you're not sure if this is OK and want to connect anyway, click No and PuTTY will attempt to connect but will prompt you the next time you try to connect.
- If you are concerned that this server connection might be compromised for some reason, click Cancel and PuTTY will abort the connection. if you are a customer of HostDime, please contact us and we can help you investigate the issue.
A new window will open and if the connection is successful, you will be prompted to enter your password.
Note You won't see anything on screen while you are typing your password. Linux servers do not show bullets or asterisks in the password prompt so no one looking over your shoulder can see how long your password is. Press Enter when you are done typing your password.
- If you typed everything correctly, you'll now be connected to a shell on your server.
| Warning |
|---|
Not all servers or hosting packages from HostDime come with SSH access enabled by default. Contact us if you'd like shell access to your server account |
| Note |
Password authentication as |
SSH Key Authentication
PuTTY can be configured to use SSH Keys keys as well. SSH Keys keys are a more secure, and often more convenient form of authentication. Please see our SSH Keys article for information on generating SSH key pairs for PuTTY, and uploading them to your server. The following steps have been written assuming PuTTYgen has been used to generate an SSH key pair, and that the public key has already been uploaded to your server .
Click the + icon next to SSH in the left-hand panel on the PuTTY Configuration screen to expand the list.
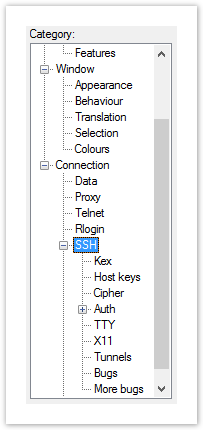
Click Auth to view the SSH authentication preferences.
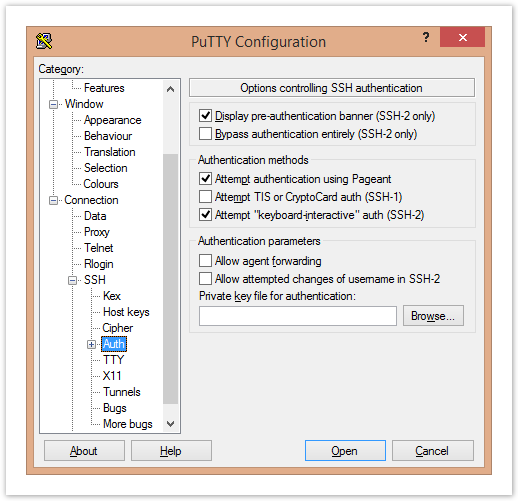
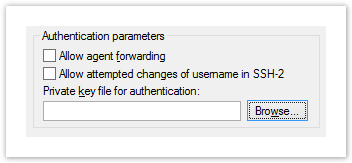
Click Browse under Authentication parameters to select a private key file (it will have the .ppk extension) from your local machine to authenticate with.
After selecting a private key, you are now ready to authenticate using SSH keys.
and you still have the PuTTY session configuration screen open from following most of the steps in the previous section.
- In the sidebar of the main configuration screen, click the small + next to SSH to expose more SSH configuration options and then click on the Auth option to view the authentication options.
- Click Browse... at the bottom of the screen next to Private key for authentication.

- Select your saved .ppk SSH key file from your local computer.
- Click the Open button and then continue from step 5 in the Configuration section above to connect immediately, or continue reading the next section to save your configuration for later use.
Saving your PuTTY Configuration
...
PuTTY allows you to save the configuration you use to connect to a server so you don't have to type all the information in each time as a Session.
- After you've filled out all the appropriate fields, and are ready to connect,
...
- make sure you are in the main session configuration screen mentioned above. You should see your server hostname and port number.
- Type in a name for your saved SSH session configuration in the text box under Saved Sessions, and click Save.
- The session you just created will appear in the list below the text box
...
- below Default Settings.
- If you want to connect to your server now, continue with step 4 in the Configuration section above.