Configuring Apache and PHP in EasyApache 4
If you would like to add or remove modules from Apache or PHP, you can do that via WHM using the EasyApache 4 interface.
- Login to WHM as the root user via https://[IP Address or Host Name]:2087
- Type in EA4 to the search bar in WHM and select EasyApache 4 from the Software section of the sidebar.
- Click the Customize button in the Currently Installed Packages box near the top of the screen. This will adjust your current Apache and PHP installation.
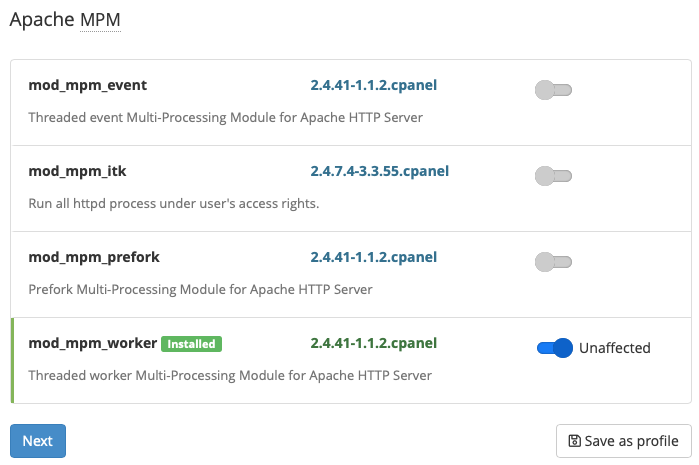
After a few moments, the available Apache Multi-Processing Modules will be displayed. The currently installed MPM will have a blue slider to the right and also show the word unaffected to show that this setting is not a change from what your server is currently configured to use. Click the Next button to go to the next section of the EasyApache 4 interface.
You can only have one MPM installed and active.
Changing the MPM can drastically change how Apache behaves on your server, so only choose something different if you understand what that change will do.
There is a set of links in the sidebar to the left. You can follow along with each of these steps or skip immediately to a specific area where you want to make changes. Clicking these quick links will not cause you to lose any changes you may have made on other Easy Apache 4 screens, so you can navigate back and forth quickly making changes as needed.
The next screen shows you all of the Apache modules that Easy Apache supports. These modules add functionality to Apache. There are quite a few of these and Easy Apache 4 only shows 10 at a time by default. You can adjust what you are seeing with the Page Size bar at the top and bottom of the list. Select more than 10 from the drop-down list or use the < or > to move back or forward one page or the << or >> to go to the first or last page. You can enable a module by clicking on the small slider to the right of the module name. If it is blue, and labeled with Unaffected, the module is currently active. If it is blue and labeled with Install, then this is a module that will be enabled once you finish provisioning this profile. If the sider is gray it is disabled. If it is grey and marked with Uninstall that module will be removed once provisioning is complete. Click the Next button again when you are ready to move on.
You will find a number of modules are already enabled on your server. Some modules like mod_security2 provide functionality that WHM and cPanel rely on. If you remove these modules some features may no longer work.
Now you can choose the major versions of PHP that you would like to make available to users on this server. Once you've enabled all versions of PHP that you want, click Next.
If you enable a version of PHP that is not currently active, Easy Apache 4 will assume that you might want this new version of PHP to be configured with the same PHP modules as any other versions of PHP that are installed already. You will be asked if you want Easy Apache 4 to automatically select matching PHP modules. If you click PHP #.# and Extensions, you will see that the new version of PHP has additional modules already selected in the next step.
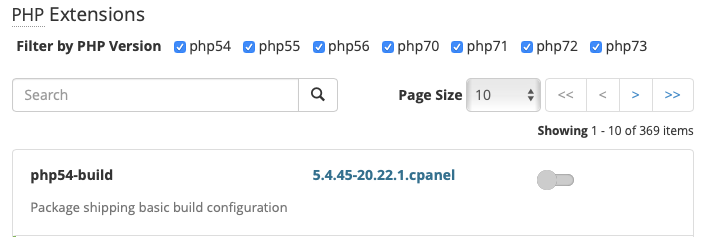
- On this screen you will be able to select all of the PHP modules that you'd like to activate. The modules on this screen only affect how PHP works. However, if you have multiple versions of PHP selected from step 6 there will be versions of most modules specifically for each version of PHP. Because there are so many modules, Easy Apache 4 offers a number of tools to help you find what you are looking for.
There are a series of checkboxes to the left of each version of PHP you enabled in step 6. If the boxes are checked, the modules for that version of PHP are shown in the list. If they are unchecked, the modules are hidden.
You can use this to focus on only the versions of PHP that you may have just added while leaving the module settings for other versions of PHP unchanged.
Please be aware that while most modules have versions for every version of PHP, there are some that only work in specific versions of PHP. For example suhosin, a PHP security hardening module is currently only available for PHP 5.x and not for PHP 7.x.
You can also search for a specific set of letters to further narrow down the list to what you want to see.
The PHP version checkboxes apply before the search criteria, so if you type in ps into the search bar but you only have php73 selected, you'll only see the PSPELL (spelling support) module for PHP 7.3, even though there are versions of that module for all supported versions of PHP.
- The Page Size bar allows you to page through the list of modules that meet the criteria you specified, just as it did in previous screens.
You can enable or disable a module by clicking the sider to the right of the module. Click the Next button to continue to the next screen.
If you don't know what a module does, you should not change its status (if it is enabled or disabled now leave it that way). Only enable modules you know you need.
If you want to enable shared hosting support for Ruby on Rails, this screen is the one where you can control if it is offered and if so what gems or other functionality are included by default. Select what you want and then click Next to continue.
Selecting a Ruby module will automatically enable mod_passenger, as Ruby support is handled via Phusion Passenger.
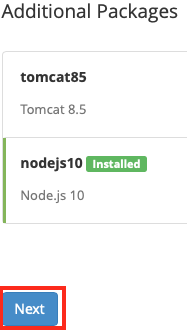
Easy Apache 4 also supports NodeJS and Tomcat if you decide you want to offer these things. Click the slider next to the options you want to offer and click Next.
Tomcat enables server-side Java (.jsp) support. It requires a lot of RAM.
NodeJS support is handled through Phusion Passenger (just as Ruby is).
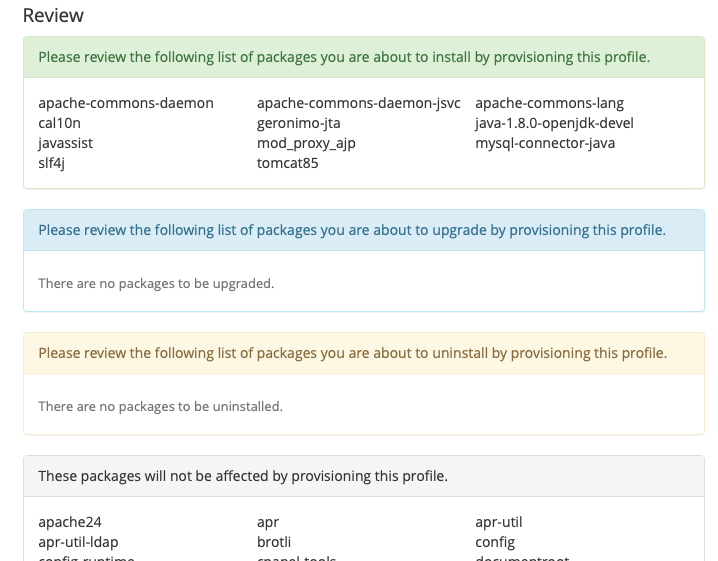
- On this final screen, you can review any changes you may have made and then click Provision if you want to apply the changes and have Easy Apache 4 add or remove items as needed. You can click Cancel to revert your changes to what you had configured originally. You can also save the settings for all of these modules as a profile. This would allow you to quickly reapply these settings in the future or export the profile to other cPanel servers and use them there.
All Easy Apache 4 supported features and modules are installed via RPM packages. This makes adding or removing features a lot faster than if they had to be manually compiled (as they did under Easy Apache 3 and earlier).
Be aware that Apache will likely be restarted after changes are applied. This will cause a moment of downtime (but it is very quick).
This process is now complete. You should test to see if the changes you've requested are now active just to be safe.


